Disclosure

Disclosure/Disclaimer: Affiliate links are used on this blog. I make a small commission on any purchase made through an affiliate link on my blog through no additional cost to you, the buyer.
I participate with Zazzle and CafePress.
The small commission payment helps me cover the custom domain costs and is greatly appreciated. Thank You

Thursday, January 23, 2020

Where Did 2019 Go?

2019 Flew By

Life and Project Updates


As many of us do, we start our year off with lots of ideas and plans in our head of all the things we are going to do including blogging and then life gets in the way. 

We had several serious health emergencies this year with several family members including the loss of my uncle.

I spent several weeks going back and forth between the state where I am living and the state the rest of the family lives in.

I am hoping and praying this year is much better! 

Now for some good things that came out of 2019, I made a Christmas Tree Skirt and a Wedding Quilt. I will share the wedding quilt in another post.

My Quilted Christmas Tree Skirt Project


My daughter asked me to make her a nice quilted tree skirt for her Christmas present. She said she wanted only green and white. We looked through some fabric I had and picked out a fabric she liked, but I didn't have enough for the project. Then I made a Pinterest board with different style Christmas tree skirts. She fell in love with a tree skirt that was a french braid style quilted skirt and the way it was pieced gave it an ombre effect. The example was blue and white and she said she would love it if I could do the same in green and white. 

So I searched and ordered a book that had the pattern (French Braid Obsession: New Ideas For The Imaginative Quilter, by Jane Hardy Miller) and then had to go fabric shopping. I love fabric shopping, but it seems I can find endless yards of fabric when I am not yet working on a project. Now if I am hunting for a particular style or color fabric to be used on a project, I am lucky to find one. I ended up buying some fabric at a local quilt shop and some in a quilt shop in another state. Then the fabric my daughter loved from Joann's, was out of stock so I ordered a bolt online.
Possible Tree Skirt Fabric
Auditioning Some Fabrics


I used freezer paper as suggested in the book for making the triangle sections. There are many patterns in the book and the strips use different widths. I decided to use 2 1/2" so I could use my strip die for my Accuquilt cutter. Cutting my strips that way saves time and they are nice and straight. I was having some trouble with the pattern as it really wasn't clear on the strip sizes and the triangle sections were not making a tree skirt that went all the way around, picture a pie with a large piece missing. I hate math, some quilters are great at it but not me. Fortunately my husband is a numbers guy and after I explained the problem I was having, he figured out what size to make the large triangles and drew it out on his cad program to be sure, so it turned out perfect.

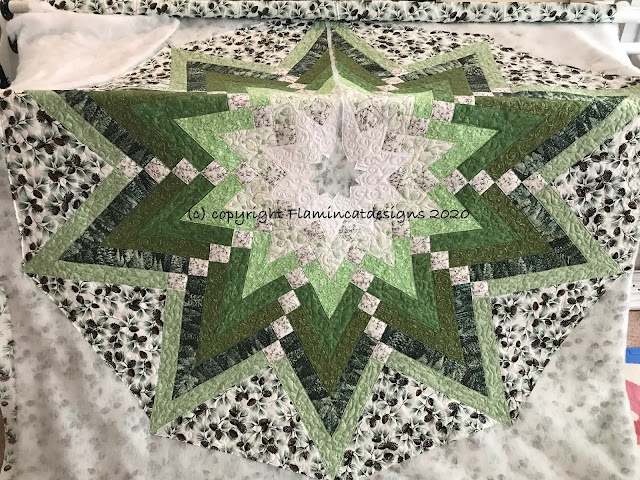
I did all the piecing on my vintage Featherweight and it did a beautiful job. Quilting it on the long arm was a bit of a challenge. It is an odd shape to baste on the frame but I was able to get it to work by basting several sections. The overall size is 60" x 60".
Featherweight Sewing
Piecing The Tree Skirt


Mounting On The Longarm
Tree Skirt Pinned and Ready For Basting On The Longarm

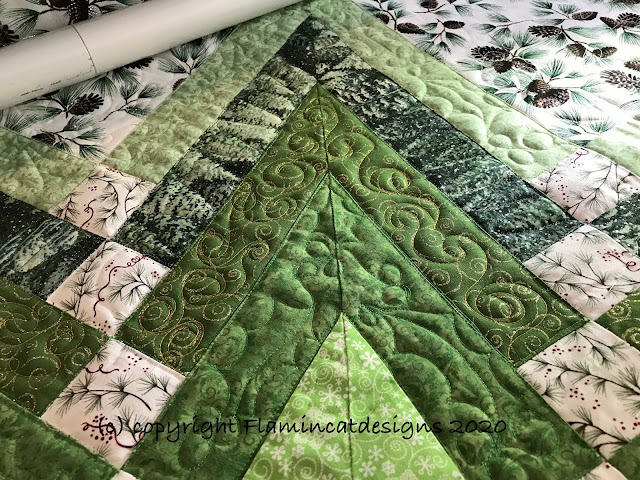
It would have been easy to quilt an overall edge to edge on it but I had an idea in my head to do a different motif on each strip, triangle and on point square. The fabric is all busy prints so the quilting blended in after washing. My daughter enjoyed examining the different areas to see what I quilted.
Quilting Motifs
Working On Quilting Each Strip


Quilting Complete
Quilting Finished And Ready To Come Off The Frame

I normally machine bind my quilts but since this is a tree skirt and the binding will show all the way around the bottom of the tree, I took the time to hand bind it.


Tree Skirt Under The Christmas Tree
This View Shows Binding

The backing is all one fabric, the sparkly pine cone fabric she loves, so if she wants to, she can use the reverse side on top. I did make a label and placed it on the split section on the back. I used the white on white snowflake fabric with green embroidery thread so it blends in really well on the back.

My daughter was thrilled when she opened her Christmas present. She had a lot of excitement in her voice and a hint of happy tears when she saw how it turned out. She called it her heirloom tree skirt. I am so happy she loved it. My husband was sad to see it go, he wants me to make one for us now.   


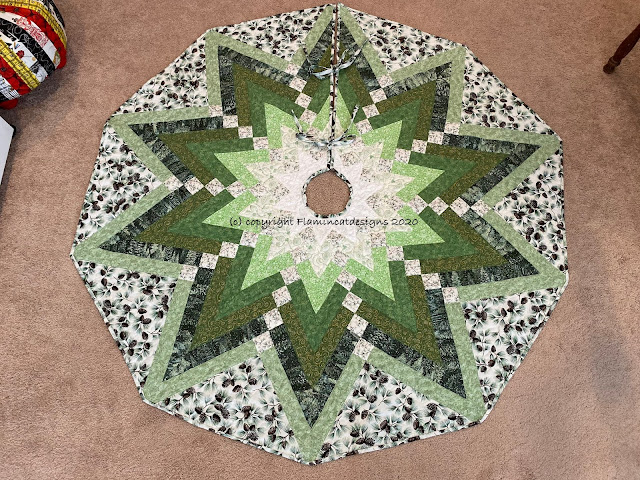
Christmas Tree Skirt
The Finished Tree Skirt


Saturday, August 11, 2018

Grandparents House Rules Wall Hanging


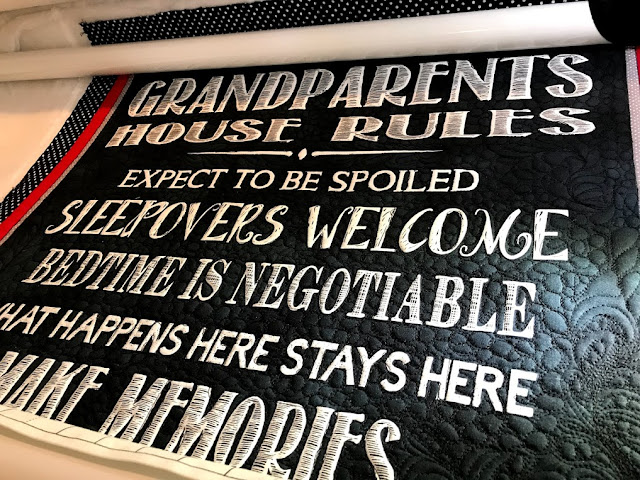
Grandparents House Rules


This is a fun panel my husband picked out when we attended the Road To California Quilt Show, Jan. 2018.  I created a couple of borders with some fabric I had and I even had some left over batting to use from a previous project. The panel is "Grandparents Rules" by Timeless Treasures.

Grandparents Rules Wall Hanging
Quilt top loaded, basted and ready to quilt.

I spent a lot of time quilting with black thread and it was really hard on the eyes to work with. Sadly the black thread on black fabric blends so well, you can only see the quilting with a little side lighting.


Pebbles quilting between the text
Started quilting pebbles and eventually got between all the letters and inside them. All these pebbles either make you better at them or just hate them. 

quilted texture

I tried adding in a few funky looking feathers and swirls.

swirled quilting

More pebbles and swirls. I was close to being done at that point. Boy were my eyes tired of black on black. Even the side lighting was not enough to make it easier on the eyes.

beginner quilter

A funky feather and more pebbles but the text was puffing out and that was what I was looking for.


dark thread on dark fabric cannot see the border stitching

You can't really tell but I did piano key quilting on the outer polka dot border. I just did the ditch for the gray and white inner border and the red border.

all done quilting

What a great feeling to be done quilting!

finished the quilting

I took it outside to see if I could get a better view of the quilting in the sun, but the black on black was still hard to see.

Wall Hanging from curtain rod.

I bound it with black and put a hanging sleeve on the back. We hung it up over a light I can turn on to help show the texture of the quilting. You still have to change angles to see it all. It was leaning towards the wall at the bottom, but it is straight....just in case you were wondering.

I'm happy with how it turned out. I don't know if I will ever do such a dark project again. 

Tuesday, May 29, 2018

Easter Bunny Table Runner

A Cute Table Runner From Remnants

Made With Die Cuts 


My Easter table runner


Sizzix Big Shot Pro, pads and bunny die


I bought this Sizzix die cutter and bunny die at a quilt show and had an idea for Easter.


I made bunnies!
 Two fabrics, one for milk chocolate Easter bunnies and one for dark chocolate.


Tasty bites out of those bunnies


I free form cut some bites out of the bunnies, because I just cannot resist a chocolate bunny.


Table runner strips sewn together


I collected Easter fabric remnants for a few years and came up with this arrangement of strips. I arranged the strips so that you will get the same view from either end of the table.

Raw Edge Applique

I used a heat bond fusible webbing to attach each of the bunnies and then a simple zigzag edge for raw edge applique.


Two table runners on the longarm

I actually made two table runners. One to keep and one to gift. I put them on the longarm with one large backing and one large batting and then trimmed around them to separate them when I was done quilting. It worked great with them together instead of messing with a skinny piece on the longarm.


Quilted bunny tail


I decided to quilt a small swirl of a bunny tail on the bunnies.

Something is really lacking here


At this point I am really not happy with the bunny tails.


Backing fabric
You can use either side of the table runner with this cute egg backing. 


Big fuzzy tail!

This looks much better.
 I shared my table runner with some people and several suggested a big fluffy fuzzy tail would look better than the quilted one. I am so glad I asked for opinions. Sometimes I just can't see what is needed. The quilted tail shows on the back of the fabric.


All done!
I am so happy with how my table runner turned out. It really adds some color and the bites out of the bunnies were a real hit.

Tuesday, February 27, 2018

Christmas Gift Quilts

I am happy to share with you the quilts I gifted to family at Christmas.


It was really hard not to share photos as I sewed away and completed them. We had a lot of family visit at Christmas and really enjoyed seeing everyone. I think everyone loved the little tv blanket quilts I made them. They are all a throw sized quilt with a fleece back and no batting. Light weight but warm enough to cover up while watching tv in the evening.

The tops were made from fabric I have collected (with the exception of one quilt top) and I used my Accuquilt to cut the pieces. I only used 3 dies between all 10 quilts and cutting went really fast using the dies. I didn't follow any pattern except for figuring out the layout on the pinwheel in the center of the green quilt.

For the backing I decided to buy fleece and I caught a great sale of 50% off which really made me happy. I decided to self bind the quilts with the fleece backing. I love how the fleece backing frames the quilt with this self binding technique. Fleece does a lot of fuzz buildup in the bobbin area both during quilting and binding, so I did a lot of cleaning.

The fabric is busy so most of the quilting stitches blends in on them quite a bit. I did a couple of pantographs quilts, but most of them were just free motion meander on my Handi Quilter Avante. I used Omni thread on the top and bottom line in the bobbin.

There are lots of photos in this post, and I hope you take a look at them all. I tried to match the fabrics for the person receiving them and to me that is part of the fun. I love the process of planning and creating the quilt top and see it come to life. You will see I love color and printed patterns.


Quilting In Process
This bright quilt comes to life on the longarm.

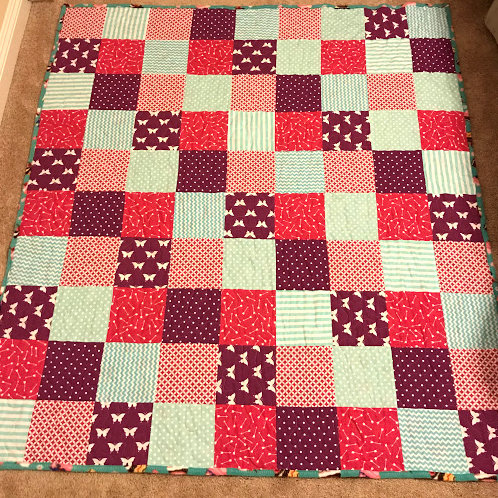
Girly Quilt
Girl quilt with fun prints


Cute cupcake print.
This fleece backing with cupcakes was perfect for the quilt.


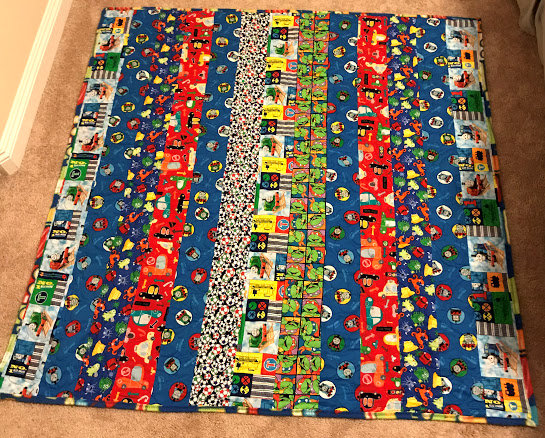
vertical strip quilt for boy
Lots of fun boy fabric prints

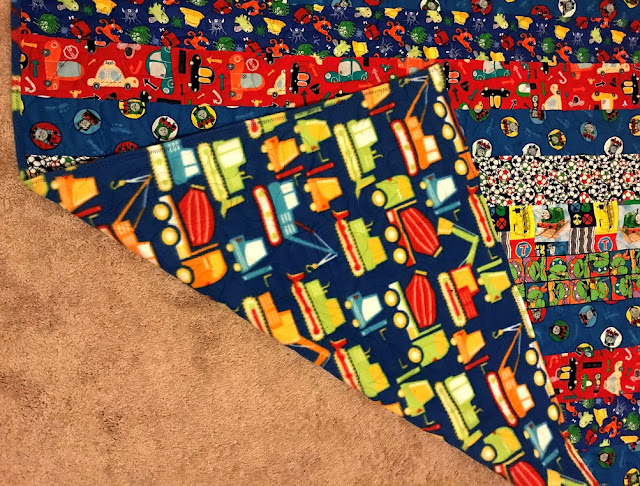
boy quilt with truck backing
I love the construction truck fleece I found for this quilt.


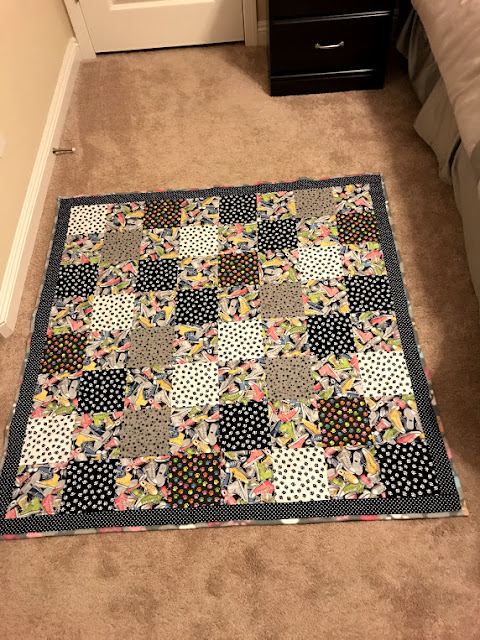
walking the dog quilt
A quilt for a dog lover and tennis shoes for walking the dogs.


full view of the paw prints and tennis shoes quilt
I love how this quilt looks completed, so bright and yet dark at the same time.

Paw prints on front and back of quilt.
This fleece matches the front perfectly and looks great bound around the edges.


gray and white quilt
Modern and a bit of an eye chart, but I think it works.

mandala fleece backing on modern gray and white quilt.
The fleece is modern and thick and all the gray tones of this quilt work great together.


a quilt for a man that loves the outdoors
An outdoor themed quilt.


Outdoor themed fabric with blue fleece plaid back
I could have gone with a green or tan fleece but blue fits the outdoor theme of sky and water.


boy quilt with superheros and space
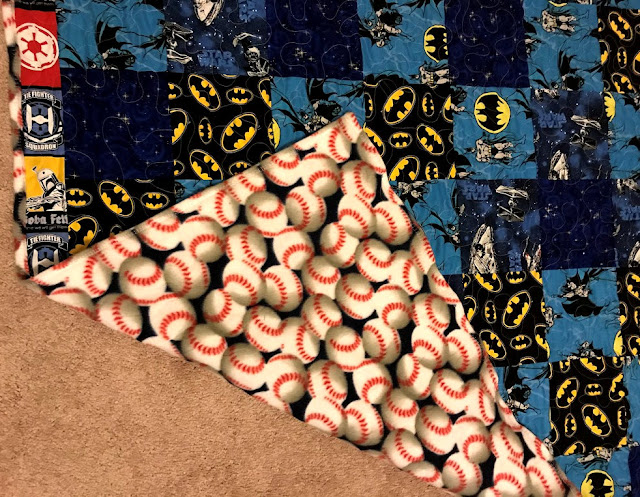
A boy quilt with baseballs, Starwars and Batman.

quilt with starwars, batman and baseballs
Perfect for this boy quilt, baseballs on fleece.

Blue and gray fabric with tiny triangle arrowhead print.
Quilt corner folded back to show the printed front and blue mottled fleece back.

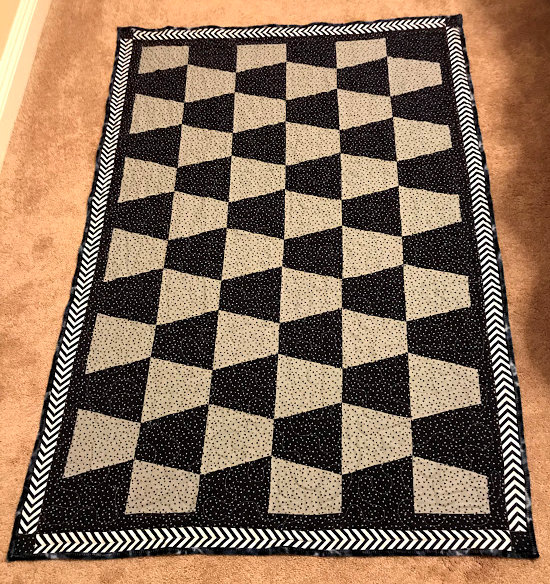
blue quilt for a man
I cut some chevron print fabric in strips to make this arrow border that goes around the quilt.
Setting the tumbler shapes on their sides with a kind of positive negative print pattern makes
this feel modern and different than any other tumbler quilt I have made.


Boy quilt with animals, monsters, soccer balls, trains and cars
Such a fun quilt to make with all the bright pieces.
The bright orange inner border breaks up the zillion little print pieces.

boy quilt front and back
Cute dog fleece print goes great with the top.


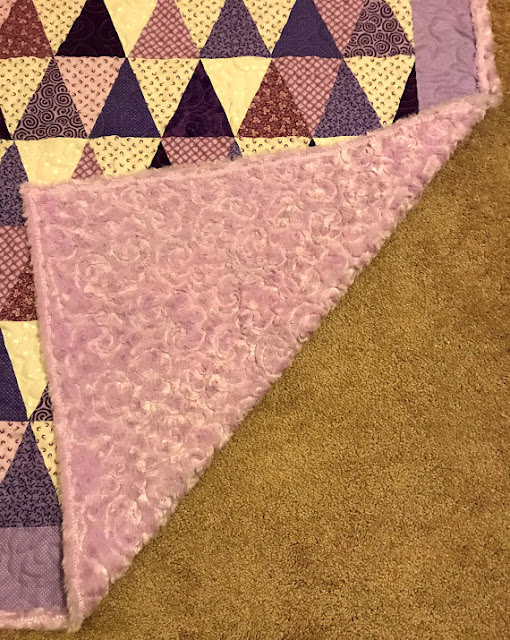
Soft and pretty purple quilt.
Fun faux fur minky fabric made this the softest quilt of the bunch.


Triangle quilt in purple and white.
I love purple and lavender.

Quilt top and back.
Pretty fleece backing like feathers or palms and I was very lucky to find a
fleece with colors that matches the fabric on the front. There were not many greens
available in fleece.

Pin wheel quilt in green and white.
The pinwheel in the center doesn't show up as well in the photo as in person.


Completed quilts.
A fun pile of the completed quilts.


I hope you enjoyed looking at my quilts, I really enjoyed making them. 


Monday, December 4, 2017

Quilted Christmas Stockings

My Christmas Stockings

Made For Family Traditions


My earliest childhood memories of Christmas include every one in our family having their own Christmas stocking that was made by either my mother or my aunt. When my kids were small I continued the tradition by making each one of us our own stocking. Fast forward to having grandchildren and time to make them their own stockings.


I decided to make my stockings quilted and used a classic rail fence out of strips.

Christmas Fabric Cut In Strips
Fabric Strips Ready To Sew


I sewed the strips together, cut them to blocks and then sewed blocks together to make tiny quilt tops. Here are a couple of them close up.

Candy Canes, Peppermints And Reindeer Fabrics
Pieced Fabric For Stocking


Holly, Candy Canes, Snowmen, Reindeer fabric
Close Up Of Pieced Fabric For Stocking


I used a poly batting and chose different Christmas fabric for the backing which will make the inside lining of the stocking. I stitched in the ditch for each of the seams.

Quilt Top With Batting And Back
Small Quilt Sandwiches


I traced one of the stockings I previously made many years ago, but made the top of the stocking a little wider as I felt it was too narrow on the other stockings.

Stocking Ready To Cut
Ready To Cut

This is my simple pattern traced from my other stockings and it is ready to have a stocking cut out of the quilt sandwich. I turned the pattern over to cut the matching opposite side of the stocking.


Lining And Two Stocking Halves
Two Halves Of The Stocking
Here is the stocking with both halves cut out, they are just laying on top of each other and I turned part of it back to show what the lining will be for this stocking.

Fitting A Cuff For A Christmas Stocking
Measuring To Sew On The Cuff

Once my stocking halves were sewn together, I found some white short plush to make cuffs, measured pinned and sewed in place.

I actually put each person's name on the cuffs but blurred them out on the rest of this post.

Applique On Stocking
Hand Applique

I cut out some Santa prints and pine cones and appliqued them on the stocking along with some green fabric to make a Christmas tree. 

Applique Snowmen
Applique On Stocking

Then I cut out this snowman family and appliqued them on top of this stocking, I also appliqued the pine cone and peppermint.  I did applique on both the sides of each stocking trying to space them out a bit. I later sewed on some cute buttons, beads and other shiny things to make them have a little twinkle.

Christmas Stockings Completed
Completed Family Of Christmas Stockings

Here are all 5 stockings for the family. I love how they turned out. Each of the grandkids get a Santa and mom and dad have the two stockings on the left. (the names on the cuffs are blurred out)


I have other projects going that I can't share yet, but I will after Christmas.

Merry Christmas to you all and I hope you get all you Christmas projects done in time.

Welcome

Welcome to my blog about my sewing, quilting and digital designs. I also dabble in machine embroidery.  I am just getting this set up and ha...

Popular Posts